Why Do I Use a Photography Workflow?
... Because Consistency Equals Higher Quality Images
Here's my 7-step photography workflow that gets me
the best photo in any situation.
Use my system if it works for you or adapt it to suit yourself.
Step 1 - Be Mindful Of Your Surroundings
Where am I and what’s happening around me? Look around, be aware.
- I'm alone on a dark street
- I'm in the middle of an angry crowd
- I have to be on guard about my safety and the safety of my gear. I admit to getting myself into dangerous situations now and again. Going out with a friend would have prevented every bad situation I ever experienced!
- If all is
peaceful and safe, the rest is easy, ... relax and enjoy ...

Step 2 - Figure Out Your Story
Every good image tells a story.
If your image doesn't tell a meaningful story, even if it's properly exposed and focused... no one will care about it. No story - no interest.
So what's the story? It might a little time to discover it...
... I sit back and watch my subject. Great when I'm photographing gardens.
I give the story all the time it needs to come to me.
But, rapidly changing situations need quick decisions! These have lots of charged emotion, like in sports. Emotion is the story.
Step 3 - Plan the Best Composition For The Image
How can I compose this image so it tells a engaging story?
- What's my angle... vertical or horizontal? I'll try both.
- Don't put the subject in the middle of the frame.
- How
close should I get to my subject.
- Use my feet and not my zoom.
- No trees growing out of someone’s head.
- No distracting objects in the background (garbage, bright spots)
- Include what makes the image stronger. Exclude what doesn't.
- Look for leading lines, curves, patterns, reflections, complimentary colours.
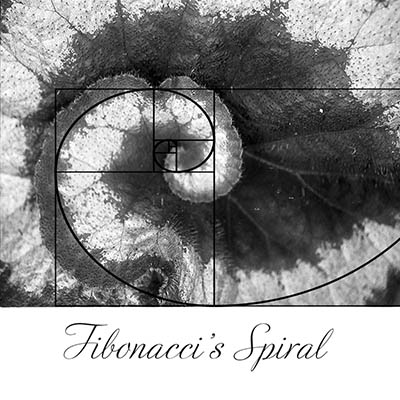
Need help with composition? Fibonacci and the Golden Mean, the Rule of Thirds, and Leading Lines.
Click on one of the images for a larger view and a slide show.


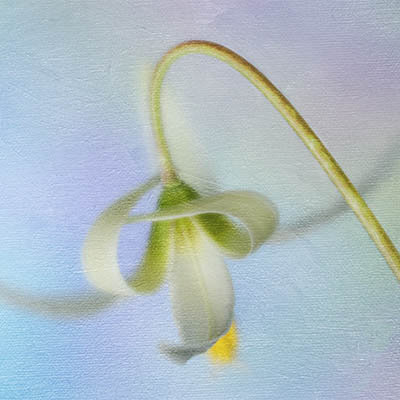
I took vertical and horizontal views of both scenes. This garden's a gold mine for composition... lines, angles, curves, repeating patterns in both views.


I walk around my subject to find the best angle.
Sometimes, I sketch a picture of the scene I want on paper. At least, I always have a mental picture of what I want.
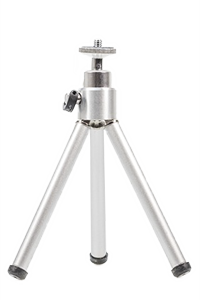
Now to set up my camera on my tripod. My photography workflow changes to a hands-on process.
|
My tripod is a valuable tool...
It's worth it's weight in gold. |
 |
Step 4 - Decide What Exposure You Need
... Is Depth of Field or Motion More Important?
- If DOF (depth of field) is most important, what's my target aperture? What needs to be sharp, what needs to be out of focus?
- If my story depends on motion, I need a target shutter speed. If my subject is moving, do I want to freeze or blur it? What about panning? Is the background moving (a subway train) and the subject standing still (a person waiting on the platform)?
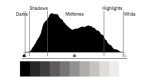
- I set my aperture, or shutter speed, and meter the scene. Do I have to change my ISO (the 'enabler') to give me the exposure I want?
- Check the histogram for the best exposure.
Confused by exposure? Go here.
With the amazing advances in technology, it's time to stop making such a fuss over
ISO…. unless you’re still using one of the original digital cameras from
the last century.
On most cameras, 800 - 1600 ISO is not a big problem (if you're exposing correctly - use your histogram). And Photoshop does a good job at cleaning up most digital noise.
*** I use a tripod so I don't worry about blurry photos or noise. It's a serious tool in my photography workflow.
Can't make heads nor tails of the Exposure Triangle?
Step 5 - Evaluate the Light
Photography means 'writing with light'. No light, no image.
Be aware of the nuances of light - it changes very quickly.
- Is is sunrise or sunset with a warm glow, or midday with a glaring hot sun?
- Where is my light source? Do I want sidelight, back-light or front?
- Does my story need dark and mysterious, light and bright, or dramatic light?
- Do I need to bounce light onto my subject. That’s often a ‘yes’.
- In bright sunshine a light reflector can double as shade. I always carry a couple of reflectors with me.
- Even if it's slightly overcast and the light is soft and even, I might still want to bounce light onto my subject's face (or a flower).
- Take one or more test shots and check my histogram. In a photography workflow, light changes constantly so I constantly check my histogram to see if the exposure needs adjusting.
|
iPhone 5s dawn light. More iPhoneography here. The cell phone cameras today are amazing at capturing the various colours and qualities of light. You can control the exposure on your cell phone camera and get some pretty darned amazing images. Add some exposure apps and get even more control. Just a reminder, it's the quality of the photographer that matters, not the cost of the gear. This is an iPhone 5s, old by all present standards. |

Step 6 - White Balance
I capture all my DSLR images in RAW. Still...
- Do I want to set a custom white balance?
- Will one of the settings on my camera (shade, cloudy, sunny or auto) give me a good result? I'll try one and adjust it, if it's not correct.
- Do I want to use a grey card or equivalent… yes, they're still handy-dandy items that make my photography easier.
Why do I care about White Balance if my images are RAW?
Because I don't have a photographic memory. The light I actually experienced at that moment .... well, I might not remember it exactly when I take the image into Lightroom or Camera Raw. The warm orange, yellow and red hues in a sunrise or the cool blue air on a winter afternoon.
I don't want to spend so much time editing, trying to reproduce the color temperature. I repeat...
... get it right in camera!
If you shoot JPG, white balance is critical.
JPGs
are 'cooked' in-camera so when you mess with
those pixels in a photo
editor the image degrades.
Give up JPG, shoot in RAW, learn to use Adobe Lightroom. : )
Step 7 - Final Check For Problems
Seems like my photography workflow is complete, but...
Wait, there’s one more thing! A final sweep all around the frame. Any photo-bombers that need to be removed before I push the shutter?
No, all is well… click. Check the histogram.
Oops…
fix it…. click. Check the histogram. After all the work I've done today, I make sure I got the very best exposure!
Well done - go home, relax while I load all my images to the cloud!
Wrapping Up 'My Photography Workflow'
These are the basics that go into my photography workflow…
... and yes, you can fit in all sorts of other things, like filters for instance.
But these are the nitty-gritty and they require a whole bunch of concentration, determination and practice. Once they become automatic, you'll see for yourself how much time it saves and how much your photos improve.
|
If you’re happy churning out ho-hum snapshots… a photography workflow doesn't matter. ... But, if you want better pictures, like magic, adopting a consistent system will help immensely. Abracadabra! |
 |
If you liked this page, you'll also like these...


Flower Photography Home › Basic Photography › Photography Workflow
SUBSCRIBE & STAY IN TOUCH
Recent Articles
-
These Heron Images Make Stunning Fine Art Prints Or Note Cards
Jan 29, 19 06:49 PM
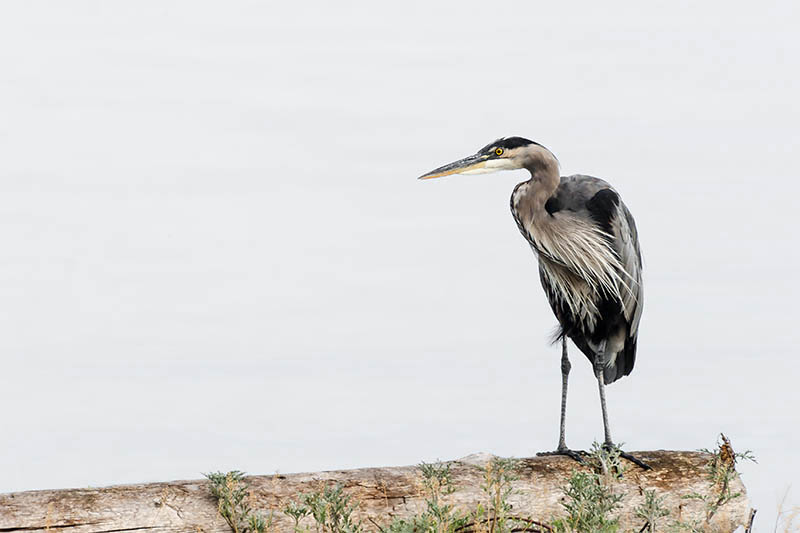 I love my heron images from here on Vancouver Island. One particular pair of herons are always obliging models. They're relaxed and trusting while I photograph and talk to them.
 -
Your Histogram Makes Correct Exposure a Breeze
Jan 22, 19 05:23 PM
 A histogram is easy to read with a bit of practice. An effective tool to help you get the picture you imagine.
 -
Yeomiji Outdoor Gardens, Asia To Europe Without The Jet Lag
Jan 22, 19 04:33 PM
 Yeomiji outdoor gardens delivers a French, Italian and Japanese garden along with several culturally significant Korean gardens.
New! Comments
Please leave me a comment in the box below.I'd love to hear your stories, share your photos and read your comments about this page.